quinoa salad

This is one of my all time favourite party tricks. Yes, this salad. For those of you who are not that familiar with quinoa, it is a grain that is very high in protein, simply delicious and easy to make. It has a marvelous nutty flavour to it and it is tastier than most rice’s and healthier to serve. 

This salad is my go to salad when I have my vegetarian friends come over. When I make this salad I more often than not don't make meat, although you can serve it with pan-fried moist chicken breasts if you want. It’s beyond filling and decked out with so many flavours that it will leave you wanting more. It’s the salad I take with to a braai (South African barbecue) and impress everyone with, or it’s a great salad to make for lunch, work or to nibble on at home.

The amazing thing with this salad is that once you get the hang of it and its ingredients you can start playing around with what you add to it, making it your own symphony of flavours. 

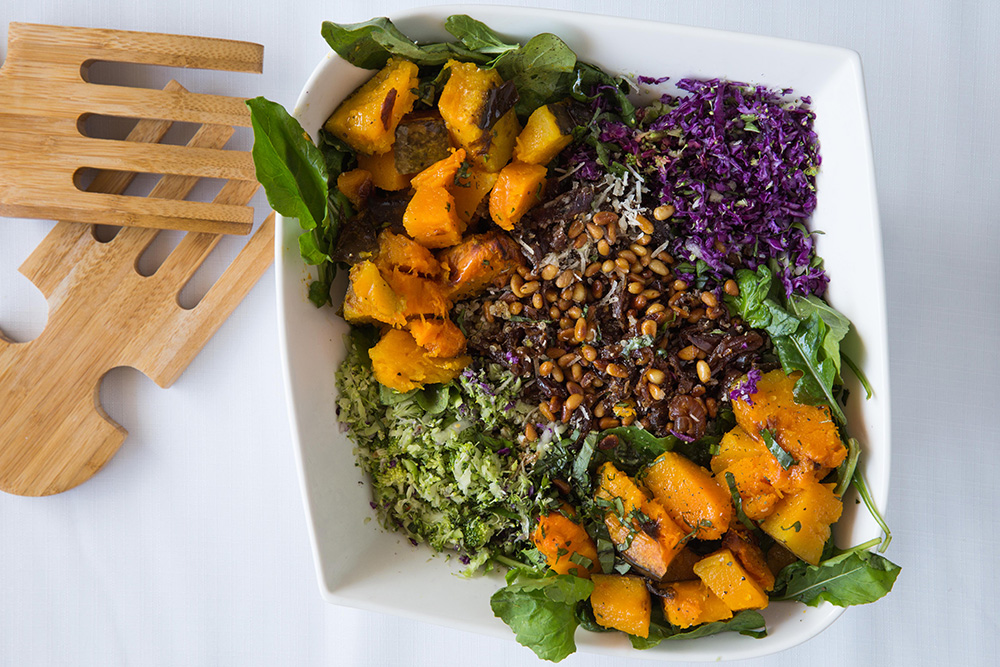
Here is my version of this healthy, delicious and colourful salad! 


Serves: 5

Ingredients:

  • 1 cup quinoa
  • 1 butternut, medium, peeled and sliced
  • half a head of broccoli 
  • 1 red onion 
  • 1 baby red cabbage
  • 50g pine nuts 
  • 100g rocket 
  • 100ml balsamic vinegar
  • 100ml water 
  • olive oil to dress the salad 
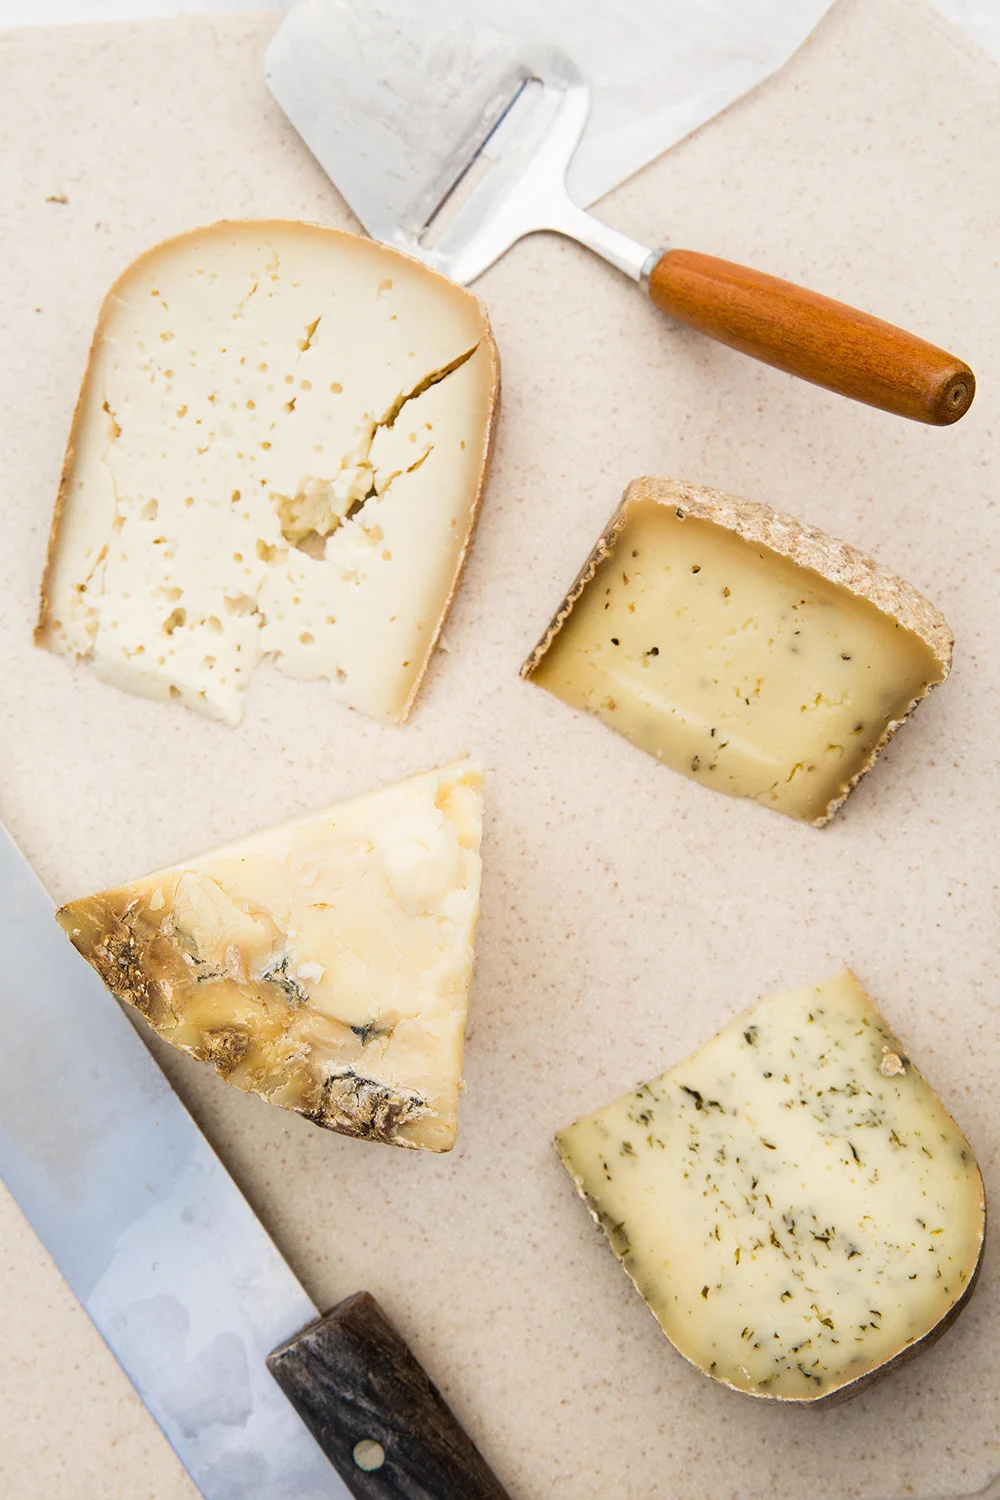
  • 40g parmesan cheese

Instructions:

Preheat your oven to 180℃

Place your peeled and sliced butternut on a roasting tray and drizzle it with olive oil. Making sure all the pieces are covered. If you do not want them to char, cover with foil (shiny side down) and place in the oven for 30-40 minutes or until soft when pierced with a fork. 

While your butternut is roasting slice your red onion into rings. If you find it easier you can also slice it in half and slice half rings from there. Put the water and balsamic into a pot over a low heat. Put the onions in and let them simmer and reduce. It should take about half an hour depending on your heat for them to become sticky and be fully reduced. Once the onions have reduced set them aside. 

In another pot put your one-cup of quinoa to two cups boiling water and a pinch of salt. Make sure the water is boiled before adding it. Cook over a low to medium heat for 30 minutes. If the water disappears before 30 minutes just turn the heat off and put the lid of the pot on. The moisture and residual heat will continue to cook the quinoa. Don’t add more water. Keep an eye on it so that the bottom doesn't burn. At the 25-minute mark just lightly fluff the quinoa with a fork. If you give the quinoa a taste it should still have some crunch but not be too hard-al dente one could say. Once ready set aside. 

In a large bowl grate the broccoli head (tree top bits), the Parmesan cheese and the baby red cabbage. Once they are all in add the rocket to mixture. 

Place your pine nuts in a small pan and over a low heat. Make sure you tend to them and watch them. When roasting nuts they can go from zero to burnt in two seconds. just keep turning them until they are golden brown and toasted. 

Grab your butternut out of the oven and add to your salad bowl. Add your quinoa and balsamic onions. Salt and pepper the salad to taste. Give the salad a good mix and drizzle with a great olive oil. My favourite is Rio Largo olive oil and you can shop it here. Once everything is mixed in and the salad is dressed, sprinkle the pine nuts on top.

This salad is great served hot but just as delicious cold! 

-Melissa

new york, new york

Yes you should spread the news and yes, if you can make it there, you'll make it anywhere...

Frank Sinatra had it right and I can really see, not that I didn't before, why this epic city is so iconic! It’s simply spectacular in every single way that you can imagine. 

For as long as I can remember I have wanted to skip over man holes and tilt my head up at the empire state building. Amazingly, thank you to certain special people in my life it became a reality October 2014. From the yellow cabs to the subways, time square and the upper west side New York City is magic. It’s a strange thing because when I went to New York I realized how small I am. There, you are no one. Which is so beautiful because it opens up the fact that you can be anyone, someone. Now who wouldn't want that!

I decided on the way, which is a very long flight from South Africa that it was going to be all about the food. I just new it. One of the food capitals of the world how could it not be a trip focused on where to eat, what to eat and how to eat it. 

The trip had to include the classic New York hot dog, the oldest pizzeria in America, the Smogersburg market in Williamsburg and of course last but not least the Cronut. We were going to fit this all in between the top of the rock, empire state building, statue of liberty, time square and anything else we could find. Talk about a jam-packed ten days. 

Walking shoes at a ready... you're going to need them. New York is a mighty beast that will not be tamed

We begin with a coffee break, something simple something small. The beautiful thing about most of the coffee shops, bakeries etc. is that at the end of every day they give all their food to the homeless and in the morning make it fresh for their patrons. 

0L8A9122.jpg

One of the first places we had to go to was of course Dominique Ansel’s bakery. For one reason and one reason alone, the Cronut.

Here it is Cronut 101 as they call it. This is a little parcel of heaven is like a doughnut and a croissant had a baby. It’s a hybrid of both and it takes a lengthy process of being proofed, fried, rolled in sugar, filled with cream and then topped with a glaze. This process takes up to three days. Each month is a new flavour and the invention of the Cronut took over two months to create. 

Having given it a practice run the day before, simply because we were unaware that the queue. Started at 6 am every single morning and you had to be one of the first 150 in the queue because the bakery only sells 300 Cronut a day. Which is understandable once you know the effort that goes into one of them. 

The next morning after a frightfully early wake up we hit the queue at 6am. Thankfully we were only number 25 in lines. the bakery opens up at 9am and thankfully the weather in October is moderate and kind to this standing in queue at this ungodly hour. The bakery is friendly and as soon as the staff arrive they come out and greet everyone handing out fresh madeleine’s as a little taster and encourager that you are on the path to heaven, you just need to wait. 

As the doors open there is a resounding cheer from everyone who simply cannot wait to sink their teeth into a Cronut. They pass a baguette as a sort of baton marking groups of twenty at a time to go into the bakery, as it is not a very large space. If you do not want a Cronut you do not have to stand in the queue. You can go into a separate queue and get other baked goods, which according to me, should be just as famous. 

Once we were in, it’s a feast for the eyes that you simply cannot believe. From decadent éclairs to delicate cheesecakes this bakery is beyond. After much debate and hungry eyes we settled on two peach and black tea Cronut’s, a lobster tail (pretzel dough filled with peanut butter and served with salted caramel butter) and a DKA 'Dominique’s Kouign Amain' tender, flaky croissant like dough with a caramelised crunchy crust. a mouth full indeed. 

Every. Single. Bite. Was absolutely worth every. Single. Second. Of waiting. 

The Cronut is all that is right with the world. Its rich moist and sugary sweet. Its beautiful layers are clear and precise. It’s flaky and chewy all at the same time. You lose yourself in every mouthful. The ice coffee that was recommended cut through the richness. A definite must for those who cannot handle the sweetness or simply want the different flavours playing in their mouths. 

The DKA is the unsung hero of this bakery. It is for me, on another level. Its perfection in its crust and its gooey center. You can break it up with your fingers and it simply melts in your mouth. The DKA has the perfect balance of flavours in its richness and its sweetness. The best part, you don't have to queue for the DKA. So there is no excuse to not get something amazing from this bakery, if you are in New York. I should be thankful I do not live in the area because I would get a coffee and a DKA every single morning. Hangover or not and probably look like one within a week! 

The lobster tail reminds me of my childhood. Salty and sweet this play on flavours was delicious. The dough is slightly heavier and not as light as the DKA but not as chewy as the Cronut. I could judge the lobster tail but anyone who judges’ peanut butter with salted caramel butter I cannot be friends with. Who needs that type of negativity in their life! It’s a great pastry to get with the DKA as its slightly more complicated in flavour and not as simple. Needless to say every choice was perfect in the bakery. i look back and wonder if we could of made an incorrect one? Each one is probably just as good as the next. 

The man is a master. *Applaud* 

The DKA and iced coffee 

the peach and black tea cronut 

So lets talk hot dogs. I decided to go to Coney island and hunt down Nathan’s famous. Home to the original New York hot dog. Served with a large soda and cheese fries, this is no place to count calories. No amount of cheese spread in your childhood will ever prepare you for melted hot cheese on fries. It’s a sin and so so good all wrapped up in one. The hot dogs are tasty and perfectly served with fried onions, tomato sauce and mustard. The only way you can go wrong is if you make the rookie error and have lunch before the rides like I did. Coney island almost got all of me that day. But I put my big girls pants on and enjoyed every second. Full belly or not! 

Little Italy is exactly how you would imagine it from the movies. Filled with Italian everything. From cannoli’s to pizza it was one of my favourite adventures. 

We decided to go to Lombari's pizza, how could we not. It’s the oldest pizzeria in America. First licensed in 1905 this pizzeria was started by an Italian immigrant with a vision. We got there late as we had gotten lost on the subway. All part of the adventure. They hustled us inside in haste and told us that we had 5 minutes to order before closing. Working well under pressure we decided our toppings and placed our order. By the time we got our hot pizza box it was time to vacate the building. We didn't care, we had pizza. Off we went on our trip back to the apartment. We had decided to eat once we had gotten home but the aromas of the pizza got the better of us. Only two slices survived the trip. We ate as we went with hungry onlookers judging us. I can assure you that the pizza was spectacular and that the ricotta cheese used will live on in my memory forever. 

Smorgasburg, lunch with a view. This amazing market is a feast for all. Its situated in Williamsburg and over looks the city. The first time I actually was removed from the skyscrapers. It feels like gaining perspective. a refreshing thought for anything in life. Each stand is unique and sells something delicious and different. I recommend following the queues. It doesn't sound fun but they are there for a reason. We visited the Mighty Quinns first and foremost. Slow smoked for 29 hours this brisket sandwich topped with pickled cucumber and chilli will melt in your mouth. 

the organic market on the upper west side on a saturday was a true treasure. it reminded me of being back in cape town. we stumbled upon it by simply taking a walk. the wonders of exploring by foot.  

organic cheese farm 

I'm no authority and it's no rule- here it is, a list of the places I went to and loved.  

lombari's pizza 
dominique ansel bakery
nathans famous hotdogs 

gooey&co
mighty quinns
smorgasburg
creperie nyc
rafele ristorante
los tacos 


-Melissa


fresh infused waters

0L8A8905m.jpg

There is one thing I know for sure hydration is key. You can dress it up any way you would like but water truly is the wine of the gods. This being said I know I never drink enough water. Especially come winter and its freezing cold.

I spent the day cooking with a dear friend of mine sharing recipes when we got chatting about the lack of hydration in my life. She suggested I give these combinations of flavored waters a try. We made them early in the morning and photographed them then got to cooking. That evening when we were done we realised we hadn't had any water the whole day! The irony was all a bit much. Needless to say having had the day to infuse with their amazing flavours these waters were a major success and beyond delicious.

I can assure you that if all your waters looked and tasted this good you would be gulping them by the gallons! They are so easy to make and you can get completely creative. I will of course let you know what combinations we used but below are a list of fresh ingredients you can use and what health benefits they have 

Berries: these little jewels are huge anti oxidants that help your body fight free radicals caused by stress. Getting rid of them can stop major illness in the body!

Ginger: this marvelous ingredient has several health properties. It is a wonder in treating nausea and morning sickness, it can lower your risk of heart disease, aid exercise induced muscles pain and menstrual pain and it can even aid digestion. Just to name a few! 

Mint: can aid ingestion or an upset stomach and its wonderful flavour can be combined with most other fresh ingredients 

Lemon: high in vitamin c this citrus fruit is amazing for colds, rejuvenating skin cells and can even aid weight loss. 

Pomegranate: this amazing fruit is known as an antioxidant rich fruit. The seeds are sweet and wonderful to add to anything. You can also put them into your ice tray and make pomegranate ice. It looks beautiful and is so healthy for you! 

Cucumber: these amazing fruits-yes I said fruit is filled with multiple vitamins B such as B1 B5 and B7. It can aid in reducing anxiety and stress and so very good for digestion. 

Lemon grass: don't be fooled by its hard exterior, once cut and its flavours release. Lemon grass is wonderful for stomach ache, high blood pressure and can aid rheumatism. 

I have used several ingredients in different combinations and amount. Play around with them and with the fruits that are in season. The longer you leave them to infuse the better they taste. if you use fresh ingredients the flavours are even stronger and most of the time all you need to do is top up on the water before the fruit goes off. 

so here are the combinations I’ve used: 

•   Pomegranate, mint and orange 

•   Cucumber, mint and lemon

•   Lemon grass, ginger and mint 

•   Lime mint and berries (strawberry, blackberry and raspberries)

You can add any fruit that you like from oranges and limes, cinnamon and apple even pineapple and rosemary!

Just chop them up to release all the flavours and add them to your water jugs. Let them stand in the fridge for a few hours or even over night! 

Keeping hydrated is good for your digestion, hangover, skin and so much more-so drink up!  

-Melissa


easter ring

There is something special about growing up in a family that honours tradition. I can say that because I am lucky enough to have a mother, that no matter what takes time out of her busy life for the little moments that I will cherish forever. Be it baking on Easter or decorating our Christmas tree. 

I grew up at her knee learning how to bake and be the woman that I am today. She is my best friend and my rock. I am sure that there will be many posts up on my blog where I speak of her. She is a taste connoisseur in my eyes and a master of flavours. She is possibly the birthplace of The Truffle Journal and all things food in my life, unless I go further back to my grandmother.

But back to tradition. Its something I value and something I hope to share. That magical moment in the kitchen baking Easter rings or setting up osterzweig (a German tradition) is something that will stay with me forever. I hope that by trying this Easter ring and sharing it around a table with loved ones will inspire you to do it every year and to bake it with your children, nieces or grandchildren. It has all the essentials to qualify as a glorified hot cross bun meets cinnamon bun, that is a game changer for Easter!


Serves: 8

Ingredients

Dough:

•   500g flour, sifted

•   5ml salt

•   55g sugar

•   10ml ground mixed spice

•   10ml ground nutmeg

•   5ml ground cinnamon

•   10g instant dry yeast

•   60g butter

•   150ml milk

•   1 egg, beaten

•   125ml lukewarm water

•   150g cake fruit mix

Filling:

•   80g butter

•   60g castor sugar

•   30ml cinnamon

•   180g cake fruit mix

•   1 egg

•   12.5ml milk

Icing:

  •   85g icing sugar, sifted
  •   15ml water or brandy depending on what you like
  •   5ml vanilla essence


Instructions:

Dough:

In a mixing bowl combine the first six ingredients. Once combined sprinkle dry yeast over.

In a small saucepan, melt the butter in the milk. Once melted set aside to cool.

Add the dry ingredients together including the fruit with the egg, milk and butter mixture and enough lukewarm water until it forms a soft pliable dough. You can do this part in a mixer if you wish using a dough hook. Knead for 10 minutes until dough is smooth and elastic. It shouldn't be too sticky. If it is, add a little flour until the dough is balanced. 

Lightly flour your counter and place the dough on the surface, covering it with a greased glass mixing bowl.

Allow to rest in a warm environment for 20 minutes. (I leave my oven on to warm my kitchen or put the dough in the sun.)

Once dough has rested you will roll out into a roughly 35cm by 25cm rectangle. Don’t forget to flour your surface when rolling so that it doesn't stick to the counter.

Filling:

In a bowl, cream butter and sugar together. Once this has creamed spread it all over the rectangle like you are buttering toast!

Sprinkle the cinnamon over the butter and then top the rectangle with the fruit mix.

Next you're going to roll up your rectangle like a Swiss roll. Starting at the long side tightly roll up the whole rectangle.

Place it on a lightly greased baking tray, shaping it into a ring. Score the ring into 5cm slices. Keeping slices joined near the inner circle. 

Cover with greased cling wrap and leave in a warm place for a further 10 minutes or until your ring has doubled in size.

In a small jug mix your egg and milk. Brush over the ring after it has risen.

Bake at 200°c, 20-25 minutes. Your ring should be golden brown. If you tap on it and its sounds hollow, it's ready!

Allow to cool

Icing sugar:

Mix your icing sugar with the water and vanilla, make sure you do not have any lumps.

Drizzle it over your ring-when it comes to this part I always say, don't be shy!

You can decorate your ring with cherries if you wish!

-Melissa


rainbow meringues

This recipe takes me right back to being a child. I received this recipe form my grandmother in a little pink book, put together by all the ladies that went to church with her. The recipe is the best I have yet to taste on meringue, as it doesn't have that jaw aching sweetness due to the vinegar. I remember making it when I was younger and being so proud of my whipped egg whites.

As I have gotten older I have played more with the recipe and these beauties are the result. They are fun and interactive and a great idea for children parties or for the adult who believes in unicorns. I had a lot of fun making these with my friend Nikita who was so kind as to hand model the dunking of the meringues. They are little mouthfuls of colour and super easy to make! This recipe can also be doubled should you need more!


serves: 6

ingridients:

  • 1 egg white
  • 2 Tbsp boiling hot water
  • 1 cup castor sugar
  • 1 tsp white vinegar
  • 1 tsp baking powder
  • powder food colouring
  • 80g dark chocolate
  • 60ml hot milk
  • sprinkles of your choice

Instructions:

Preheat the oven at 100°c

Line a flat baking tray with baking paper and set aside

Beat the eggs white on high speed with an electronic mixer. As they start to stiffen add the cup of sugar followed by all the ingredients except the baking powder.

Once the egg whites are stiff add the baking powder.

At this stage is when I separate the egg whites into different bowls. Sprinkle the colouring into the individual bowls. Don’t mix the colouring in as you will beat out the air of the egg whites.

Get your piping bag ready. Using a star nozzle and holding your piping bag open, gently scoop the first colour into the piping bag. Gentle squeeze out the meringues mixer into swirls the size of a teaspoon. Working neatly and in rows.

Once you have finished the first colour, wash the piping bag with hot water and repeat with the next colour. Make sure the piping bag is clean and dry.

Once you have piped out all the different colours into neat rows put them into the oven and bake for 2 hours.

Dipping chocolate:

Place a small bowl on top of a pot of boiling water. Make sure no water can splash into the bowl. Add the chocolate by breaking it into small pieces. The steam will gentle melt the chocolate. Keep stirring it until you have a smooth consistency. Then add the hot milk. The milk must be hot or you can seize the chocolate. Once it is all combined remove from the heat and allow to cool slightly.

Once your meringues are out of the oven and cooled, dip the bottom end of them into the chocolate, followed by the sprinkles. Place them on a cooling rack upside down so that the chocolate can set.

If you want you can also dip the meringues in chocolate and match them up to another in size. Sticking them together and making meringue sandwiches. Roll the meringue sandwiches in the sprinkles and let them stick to the side of the meringues.

Serve with laughter, love or simply a great cup of tea.

-Melissa